REVIEW · KYOTO
Ramen Broth Class by Michelin Guide Shop & Custom Chopsticks
Book on GetYourGuide →Operated by Musoshin Fit inc. · Bookable on GetYourGuide
Fresh ramen starts with broth. This class in Kyoto’s Gion teaches you how to build a soup you can repeat at home, and you finish by eating what you made. Two details I really like are the name-engraved chopsticks (a proper keepsake, not just a gimmick) and the way the chef-led process is designed around fresh components you can recreate.
One thing to consider: it is not wheelchair-friendly, and kids under 10 shouldn’t participate. If you’re able-bodied and okay with hands-on cooking for about 90 minutes, this feels like a great use of a travel afternoon.
In This Review
- Key highlights worth your attention
- Kyoto’s Gion ramen lesson: hands-on, not a demo
- Your first 10 minutes: tenugui, apron, and name-engraved chopsticks
- The 90-minute flow: broth first, noodles next, then toppings
- What you actually learn: ramen broth you can recreate at home
- Noodles and timing: why fresh noodles change the whole bowl
- Chashu choices: two pork styles, one that you can only get here
- Dietary needs: gluten-free, vegetarian, and vegan options that actually fit ramen
- Price and value: $58 for a skill, a meal, and real souvenirs
- How to get the most from the class (and not feel rushed)
- Is this the right fit for you? The honest pros and one constraint
- Should you book the ramen broth class in Kyoto’s Gion?
- FAQ
- How long is the Ramen Broth Class?
- What souvenirs do I take home?
- What will I eat at the end?
- Do they offer vegan, vegetarian, or gluten-free options?
- Is this class suitable for children or wheelchair users?
- What should I bring to the class?
Key highlights worth your attention
- Name engraving chopsticks: your name is written on chopsticks using a special machine, then boxed as a souvenir
- Tenugui becomes yours: the head towel you use during cooking is part of the take-home set
- Chef-style broth teaching: you learn how to make ramen soup in roughly 40 minutes, then move to noodles
- Fresh noodles and handmade toppings: noodles are made at a nearby Musoshin noodle factory, toppings come from the nearby Musoshin Gion restaurant
- Two chashu styles: pork belly chashu and pork cartilage chashu, with the cartilage option only available here
- Dietary options that go beyond toppings: gluten-free and vegetarian/vegan choices are offered, including options for broth
Kyoto’s Gion ramen lesson: hands-on, not a demo
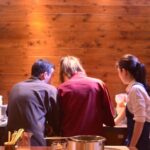
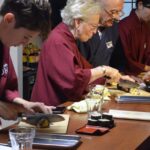
Kyoto’s Gion is famous for slow streets and careful details, so it fits that this ramen class feels like a craft session, not a staged performance. You start in a traditional setup and quickly shift into real cooking rhythm: you wash your hands, put on the chef gear, and get guided step-by-step until your bowl is finished.
What makes this feel like a good “Kyoto moment” is the connection between what you learn and what you eat. You’re not just tasting something someone else made. You’re learning the broth method first, then you cook noodles, assemble toppings, and eat your own ramen at the end.
There’s also a strong brand credibility behind it. Musoshin Toronto has earned Michelin recognition for four years, and that kind of consistency shows up in the way the class is organized and how polished the final bowl tastes.
You can also read our reviews of more tours and experiences in Kyoto.
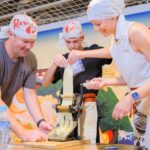
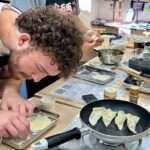
Your first 10 minutes: tenugui, apron, and name-engraved chopsticks
This experience begins with two personalized souvenirs, and they’re not vague. First, they ask for your name. Then they engrave it onto a pair of chopsticks using a special machine, place them in a traditional Japanese box, add color, and present them to you as a one-of-a-kind souvenir.
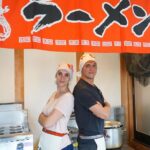
Second, you receive a Musoshin tenugui head towel. You wrap it around your head, put on a Musoshin apron, and you’re basically in chef mode for the rest of the session. It’s practical too: the head towel helps keep things tidy while you cook, and then you leave with it.
I like this approach because it makes the class feel memorable even if you forget every exact measurement later. You’ll still have the chopsticks and the tenugui sitting in your kitchen, reminding you of what you learned.
One extra included perk that’s easy to overlook: there’s a special-effects-themed photo spot. If you like capturing travel memories, this gives you a fun moment without needing to hunt down a separate location.
The 90-minute flow: broth first, noodles next, then toppings
The class runs about 90 minutes. The soup-making part takes around 40 minutes, and that timing matters because it keeps the session from dragging. You spend enough time learning the key flavor work, then you move into the final steps so you can actually eat while the whole process is still fresh in your head.
Here’s how the sequence generally feels:
1) Preparation and chef gear
You get set up, handle the souvenir process, and wash your hands thoroughly before cooking starts.
2) Broth lesson (about 40 minutes)
A professional chef teaches you how to make delicious ramen broth using a method designed to be repeatable. The goal is not to overwhelm you with technical lectures. It’s to help you build a broth you can recreate later.
3) Noodles and assembly
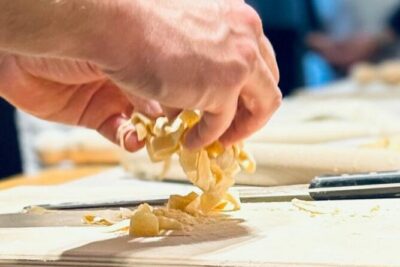
Once the broth is ready, you cook fresh noodles. These are homemade noodles made at a nearby Musoshin noodle factory, which is a big part of why the final bowl tastes so right.
4) Toppings and finishing
All ramen toppings are handmade by the chefs. They’re sourced from the nearby Musoshin Gion restaurant, so your bowl reflects the same style of toppings you’d expect from their restaurant operation.
Then you eat your completed ramen.
What you actually learn: ramen broth you can recreate at home
The big promise here is straightforward: you learn how to make authentic ramen broth at home. That’s the heart of good ramen, and it’s also what most home cooks struggle with. The class tackles it by focusing on broth first, then building everything on top of it.
The teaching style matters too. In past sessions, the owner has taught patiently and kindly from scratch, and you also get a recipe at the end. That combo is important for value: you’re not only leaving with a meal. You’re leaving with a follow-along reference you can use when you’re back at your stove.
You’ll also be guided through seasonings and how they work together. One thing I find useful in a ramen class is learning what to taste for, not just what to add. Even if you tweak the recipe later, having that flavor logic helps you avoid making bland soup and calling it ramen.
Noodles and timing: why fresh noodles change the whole bowl
After the broth is done, you cook the noodles. This is where the class has an advantage over many cooking experiences: the noodles aren’t generic dry noodles. They’re fresh and homemade from a nearby Musoshin noodle factory.
Fresh noodles do two things for your final bowl:
- They hold texture better during serving, so you don’t end up with mush.
- They pair more naturally with broth flavor, so the bowl tastes like ramen instead of noodle soup with toppings.
If you’ve ever had instant ramen and felt let down, this is the “why.” The noodle choice is a major ingredient, even when you think of ramen as mostly broth.
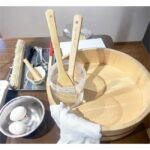
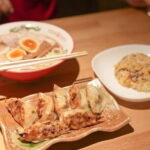
Chashu choices: two pork styles, one that you can only get here
Toppings are handmade, and you get to experience the chashu options that define the bowl. There are two styles offered:
- Pork belly chashu: carefully prepared over one full day in the kitchen
- Pork cartilage chashu: pressure-cooked for two hours and seasoned with a special sauce, and this option can only be enjoyed here
That last detail is the kind you don’t see in many classes. If you love ramen toppings, you’re not just learning theory. You’re getting restaurant-level ingredients and choices, including one that’s exclusive to the experience.
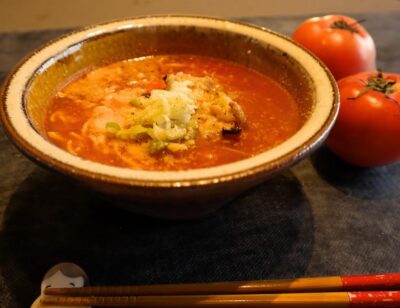
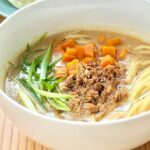
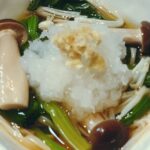
On top of either chashu, your bowl is finished with a seasoned soft-boiled egg, bamboo shoots, and green onions. It’s a classic build, and it’s a good one to learn because you can recreate it later with different toppings if you want.
Dietary needs: gluten-free, vegetarian, and vegan options that actually fit ramen
One of the strongest positives from the experience is how they handle dietary restrictions. Gluten-free options are available, and vegetarian and vegan options are offered not just for toppings, but also for broth.
That matters because ramen broth is where the flavor foundation lives. If a broth can’t match the dietary need, you end up with a compromise that tastes different from what ramen should feel like. Here, the approach aims to keep the ramen identity intact.
In practice, that gives you more confidence booking this even if your group includes people who don’t eat the standard pork-and-broth style. If you’re traveling with friends who eat vegan or vegetarian, this class is one of the better options for keeping everyone at the table rather than sending someone off to find a separate meal.
Price and value: $58 for a skill, a meal, and real souvenirs
At $58 per person for about 90 minutes, it’s not a budget activity. But the value stack is strong when you break down what’s included.
You’re getting:
- A chef-led ramen broth experience designed to help you recreate it at home
- The noodles and toppings used for your meal (with fresh noodles and handmade toppings)
- The right-to-eat what you make
- Take-home souvenirs: your used Musoshin tenugui and engraved name chopsticks in a traditional box
- A special photo spot
Most cooking classes charge for instruction and ingredients. This one adds souvenirs that feel personal and tied to the class, plus a finished bowl you can eat right away while you’re still in learning mode.
So the price makes more sense if you care about technique and want something you can bring home. If you only want a quick snack and a couple photos, there are cheaper ways to spend an afternoon. But if you want a ramen skill plus a real meal plus lasting keepsakes, $58 can feel reasonable.
How to get the most from the class (and not feel rushed)
This is an active cooking class. You’ll want comfortable clothes you can move in. A camera helps too, because the chopsticks engraving and the chef set-up are visual moments.
If you care about recreating the broth later, pay attention to the flavor decisions. Take mental notes on the step where the broth starts to smell like ramen. The experience is built around the idea that you’ll be able to make it again, so the most useful takeaway is the method, not just the end result.
Also, plan your expectations around the format. It’s timed: broth about 40 minutes, then noodles and assembly. That keeps it fun and efficient, but it also means you shouldn’t treat it like a casual chat that drifts.
Language is handled too: instruction is available in English and Japanese, so you won’t be stuck if you don’t read Japanese cooking terms.
Is this the right fit for you? The honest pros and one constraint
This class fits best if:
- You love ramen and want to understand broth, not just toppings
- You want an experience you can repeat at home with a recipe in hand
- You like practical souvenirs tied to your name and the time you spent cooking
- You need dietary options, including vegan or vegetarian choices that extend to the broth
It may not be the best fit if:
- You need wheelchair access (it’s not suitable for wheelchair users)
- You’re bringing children under 10 (participation is not recommended)
- You prefer a passive food tour rather than hands-on cooking
One more small consideration: the meeting point can vary depending on the option you book. So double-check your exact option so you don’t waste time searching when you’re already in Kyoto.
Should you book the ramen broth class in Kyoto’s Gion?
If you want a Kyoto activity that feels like food culture and skill-building at the same time, I’d say yes. This is one of those experiences where the best souvenir is knowledge you can use, and the best reward is the bowl you made minutes before you eat it.
Book it if you’ll actually try to cook ramen again at home, or if you’re traveling with someone who loves ramen and wants a class that takes flavor seriously. Skip it if you want a quick attraction-style stop, or if mobility needs or age requirements won’t work for your group.
If you do book, aim to show up ready to cook and taste. The class gives you the foundation and the recipe, and the name-engraved chopsticks and tenugui help keep the memory tangible long after the broth is gone.
FAQ
How long is the Ramen Broth Class?
The experience lasts about 90 minutes.
What souvenirs do I take home?
You take home the tenugui you use during cooking and chopsticks with your name written/engraved on them, presented in a traditional Japanese box. You can also enjoy the included special-effects-themed photo spot.
What will I eat at the end?
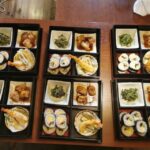
You eat the ramen you made, including broth, noodles, and toppings such as chashu, soft-boiled egg, bamboo shoots, and green onions.
Do they offer vegan, vegetarian, or gluten-free options?
Yes. There are gluten-free options, and vegetarian and vegan options are available, including options for the broth.
Is this class suitable for children or wheelchair users?
Children under 10 are not recommended for participation, and the activity is not suitable for wheelchair users.
What should I bring to the class?
Bring a camera and comfortable clothes.